There’s an old line in education that goes “why do they want me standardize my testing, but differentiate my instruction?” We all realize that our students are different, but then those differences clash with the reality of having 185 students. How can I make my instruction, my learning activities different for every student in my class?
So we pull out the old “learning styles” handbook and look for a visual tie-in, or an auditory tie-in, or even a kinesthetic tie-in. But even these attempts sometimes trap our students into the same instructional and performance activities. A high school student, Kasey Tamamoto, (of Amy Burvall) in Hawaii pointed out the nature of this problem in her student-created video below:
One of the problems with creating new learning opportunities is that they are stuck in the same locale. Now I would LOVE to take field trips, being able to take my students on a Magic School bus to some exciting location would be so cool.

But let’s face it, they are a pain to organize and set up. I would love to take my students on a walking field trip off campus, but I’m not sure that going to Thrifty’s ice cream is going to cut it in a high school English class. (Yeah I know I could “stretch” the description) I’ve taken my classes outside to work on butcher paper projects, to explore the grounds of Fountain Valley High School, to read outside, to play a game of “telephone” or “rumor” as an into activity for The Crucible.
But it wasn’t until a Google-sized problem came up two summers ago that I thought of the idea of a Google Field Trip.
Two summers ago (2014) I was asked to become a Lead Learner (instructor) for the Mountain View Google Teacher Academy. I was nervous. I knew that I would have to think up a learning activity that these highly qualified teachers had never seen or experienced. While the planning team was getting to know each other, Danny Silva, our leader said “There’s just one problem. We don’t have enough classrooms so can one of you do something outside?”
BINGO
As you know, creativity craves constraint, so I had two constraints right from the start. We had to learn outside and it had to involve Google tools. I must have been on to something because Cory Pavicich, the director of instructional technology at the University of Colorado, asked if he could join me in our experiment. He was my Lead Learner, when I attended my first Google Teacher Academy in Chicago. We even took a boat tour together after the event.

So here is what our students did.
STUDENTS’ FIRST STEP:
We created a Google Map with “pins” to locations around the quad in the Google Complex in Mountain View. Every student got a bit.ly, QR code, or NFC tag that opened a Google Map. It looked like this:
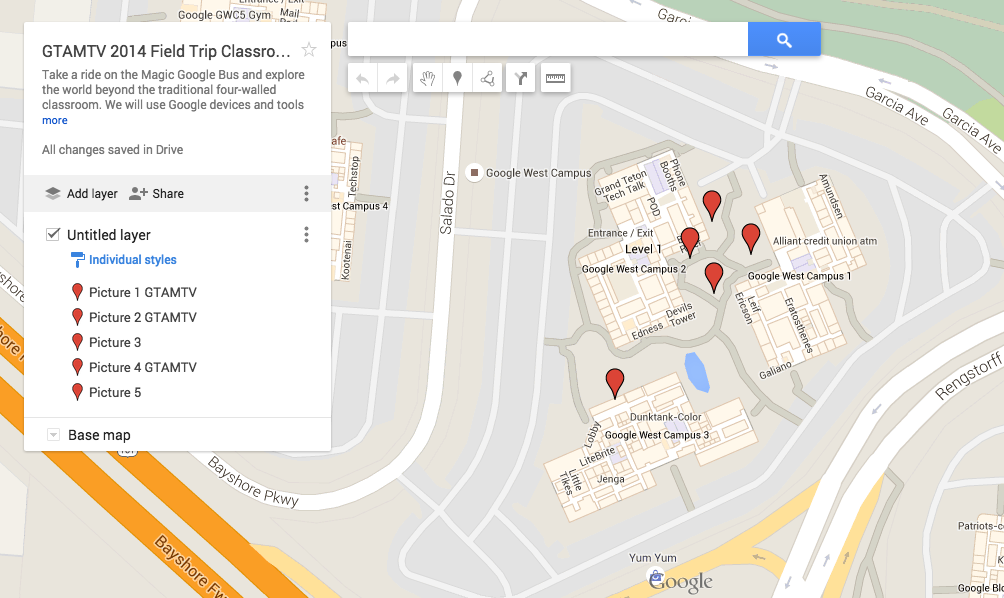
Here is the actual Google Field Trip map link
Here is another example of a Google Field Trip that I did on the campus at Fountain Valley High School. This example has multiple subject examples.
STUDENTS’ SECOND STEP:
Before the students started their field trip they paired up with another student or joined a small group. If you have a class where not every student has a smartphone, you can make sure every pair or every group has at least one student with a smartphone and access to either Google Drive, Google+ communities, or some social media share site that supports hashtags.
Each group or pair used Google Maps to walk to the location of a “pin” Once they arrived at a pin they looked for the QR code or bit.ly link. You don’t want to put the final image or task on the map itself otherwise students can just sit down and do every activity. You want them walking around and exploring their environment.
Once they find the QR code or bit.ly they open it on their smartphone or tablet and they will see an image or quote. Here are some examples of what they might see.

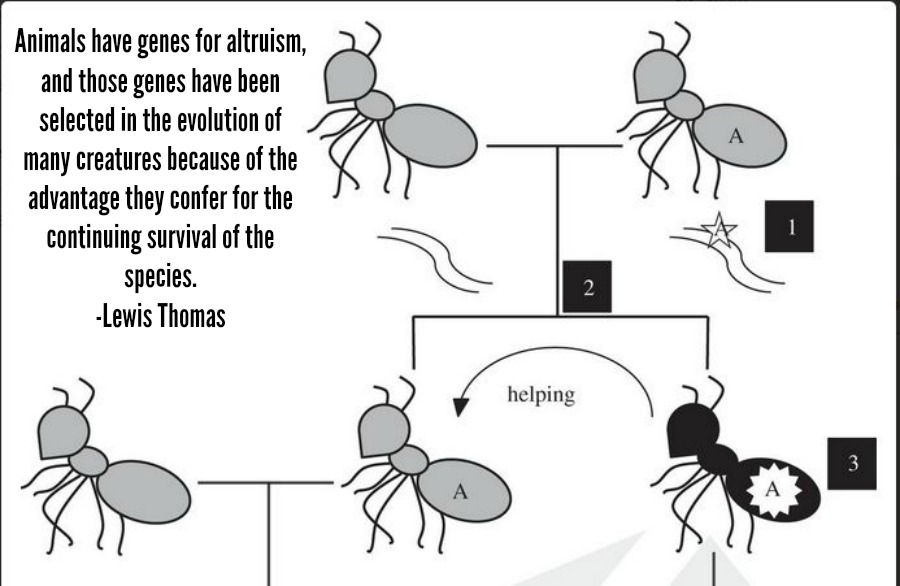

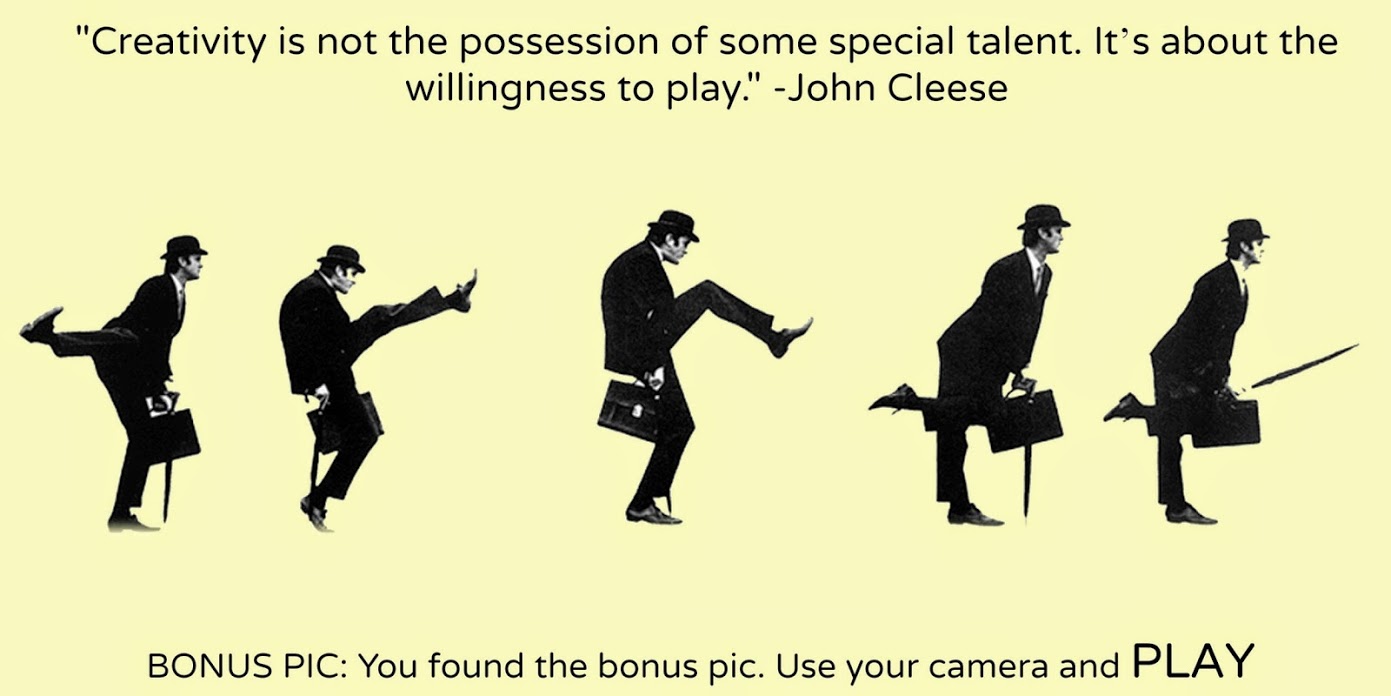
At this point the students take a photo that answers or symbolizes the quote or task. If you want you can leave objects or activities at each site for students to complete or to help students create metaphorical or literal “answers” to the prompt. Here are a few examples of what we left for students.


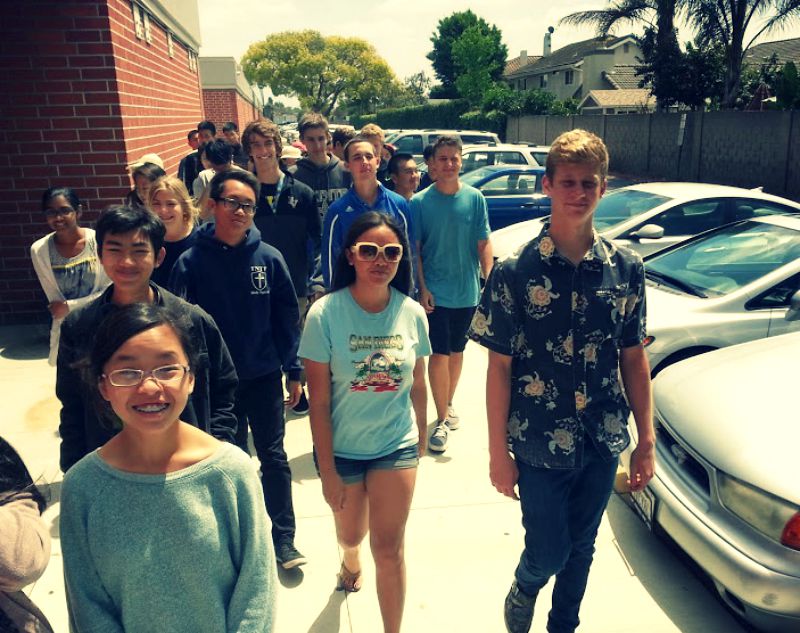
So what did it look like while they were creating? Here are some examples:


So how does the teacher make this happen?
TEACHER’S FIRST STEP:
You need to pick a unit, story, historical moment, something that you think will work with this. Heck, we have students go to Knott’s Berry Farm for Physics Fun Day and you could definitely set this up at an amusement park. Pick something that you want to make memorable. This assignment should end up being memorable and will produce creations that are hopefully worth keeping and sharing.
TEACHER’S SECOND STEP:
Create the tasks, pictures or quotes. These should be created on a file or image that you can upload to a your Google drive and make sure you set the share settings to “view by anyone with the link.” You might want to put them all in one folder and just change the folder share settings.
Then grab the share link for each picture, video, or whatever you are having the students view and create a custom bit.ly for that link. Make the bit.ly short. Once you have all of this you are ready to create your map.
TEACHER’S THIRD STEP
Login to your Google account. Go to Google and Google My Maps.

Then click “Create a new map.” If you notice, there is an “Open a map” button where you can open maps you have made in the past.

Then look up the location where you will create the “Field Trip.” For this map I’m making the activity location: Fountain Valley High School.

As you can see the map will need to be zoomed so that you can drop location “pins” near specific buildings or landmarks.

It will be much easier to find the specific spots on the map if you first click “base map” and then select the “satellite” view.

You might have noticed that you should title your map and you can also share the map via traditional Google share methods or you can share it via the url at the top of the browser.
You could make just ONE map and put multiple activities, novels, units, etc… on the map, but I prefer to just have one activity per map.
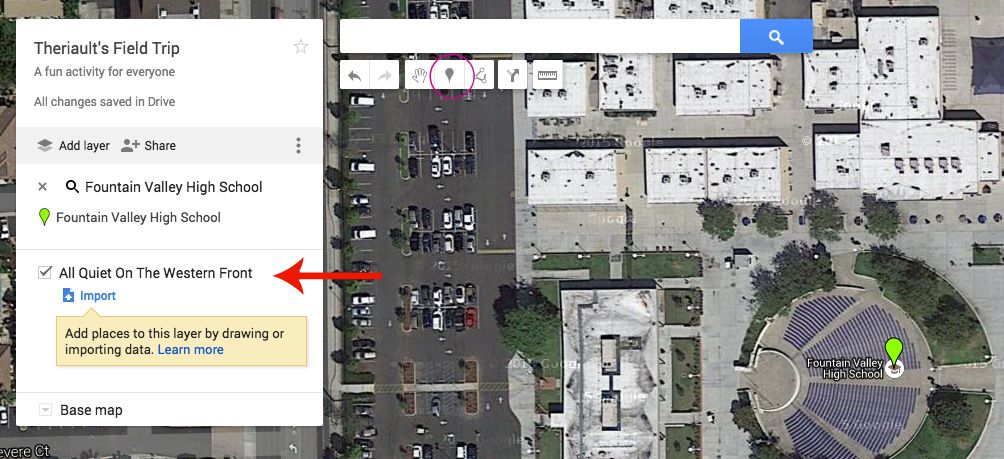
You place “pins” or activities on the map by clicking on the pin icon, just below the map search box. I’ve outlined the create a pin icon in a thin red circle.

Once you place the new pin. You can title the pin according to what you want the students to learn or do.
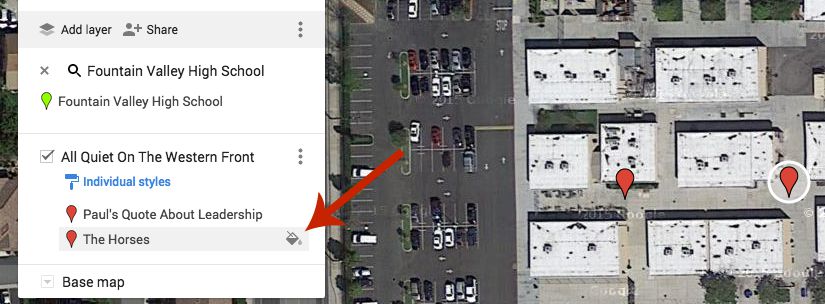
You don’t have to do this, but if you want to change the color of some of the pins or even the shape of some of the pins. Just click on the “paint bucket” icon next to one of the pins.
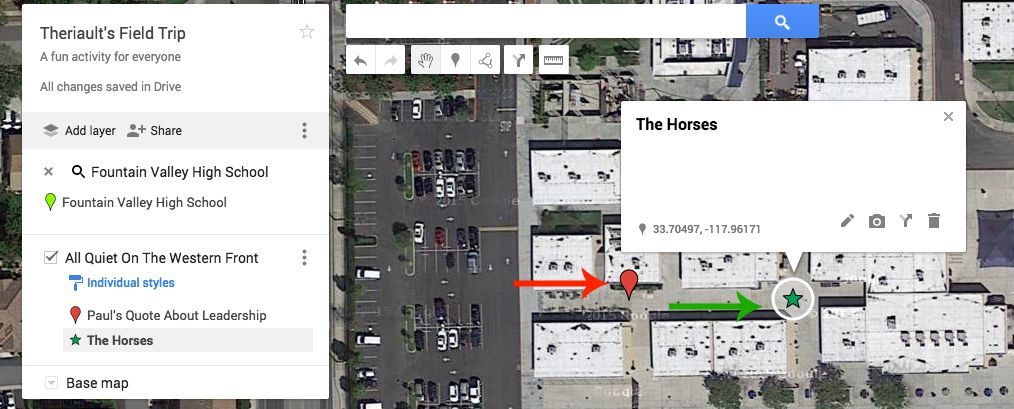
As you can see here, I’ve changed not only the color (to green), but I’ve changed the shape to a star.

If you want, you can include pictures on the pin or clues to the location of the bit.ly or QR code location, or just some interesting facts or specific directions.
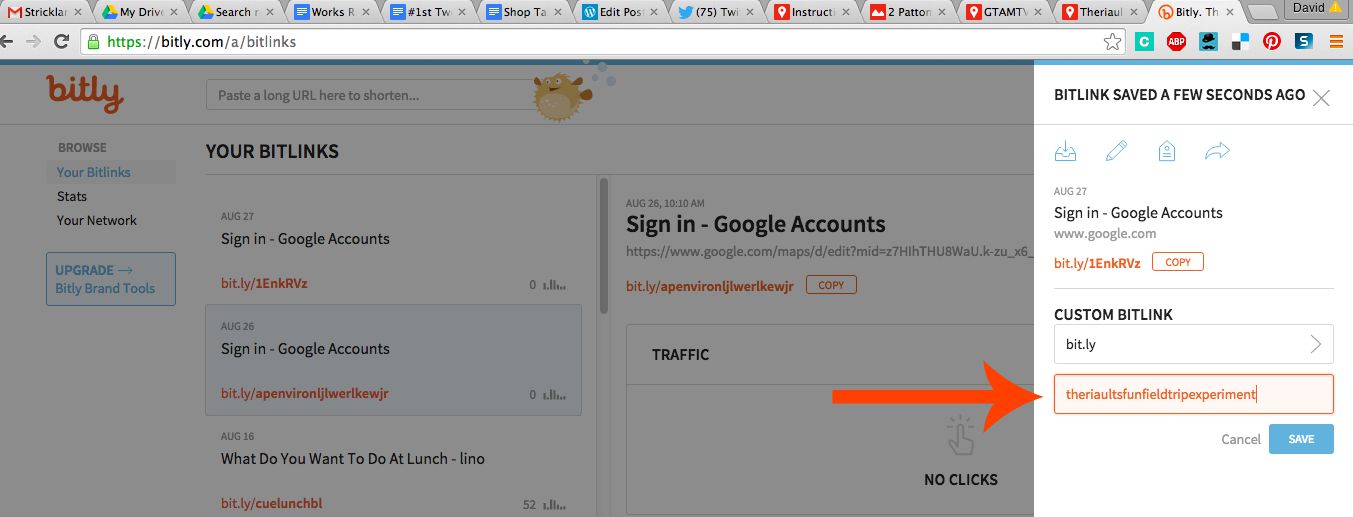
Once you are completely done with your map. Grab the url of the completed map. Then go to bit.ly.com and make sure you sign up for an account or sign into your account. Then drop your long Google url into the bit.ly converter and transform it into a custom shareable link. Write this link on your whiteboard or on a handout and your students can easily type in the bit.ly and then your custom Field Trip map will open on their smart phone.
Remember. You are taping or placing custom bit.ly links near the pin locations and each bit.ly will open a photo, video, or a Google doc that will enable your students to create and take photos or videos of their learning activity.
One more note about using video and audio. Audio capture is really tricky outside using a smartphone. If your students are making Vines, or short Twitter videos you might just want them to pantomime their acting and then have the students dub in the audio “live” in the classroom. You could have your students act out a sentence in Spanish and then challenge another group to say the right spanish sentence for what they see being acted out in the video clip.
PS: Cory helped this session rock in SO many ways: shopping for play objects, costuming, finding good quotes, thinking through the intro and transitions, but one of the coolest things he did was introduce us to NFC (Near Field Communication) tags. So in addition to the QR code or bit.ly, you can use a re-programmable NFC tag to show show the images. Just tape the tag somewhere near the “pin” and have your students hold their phones near the tag. You can even use these tags at school in your classroom or hallways to bring students to videos, websites, images, documents etc…. they are really cool.

One thought on “FIELD TRIP: Take Your Learning Outside”